Quick Manual Settings
Manually configure your mail client using the settings below:
|
RockN.host2- US - Houston (TX)
Secure SSL/TLS Settings (Recommended)
|
RockN.host2- US - Houston (TX)
Non-SSL Settings (NOT Recommended)
|
|||||||||||||||||||||
Note:The above SSL settings are for our RockN.Host1 (Special & most Starter Plans) servers. If you do not know which server you are on Contact Support.
|
RockN.host1- US - West (LA)
Secure SSL/TLS Settings (Recommended)
|
RockN.host1- US - West (LA)
Non-SSL Settings (NOT Recommended)
|
|||||||||||||||||||||
Note:The above SSL settings are for our RockNspace1 (Business & Corporate Plans) servers. If you do not know which server you are on Contact Support.
Step By Step Instructions
Setting Up Windows Live Mail Desktop Client
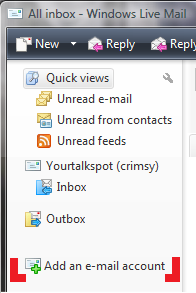
- Open the Windows Live Mail client.
- From the Main menu [Right hand side] Select Add an e-mail account:
- On the Wizard that Appears fill all information accordingly.
- Email Address: The email you are configuring you@yourdomain.com
- Password: Self explanatory, check 'Remember Password' if you so desire.
- The name of the user for this account; you can type anything you want here.
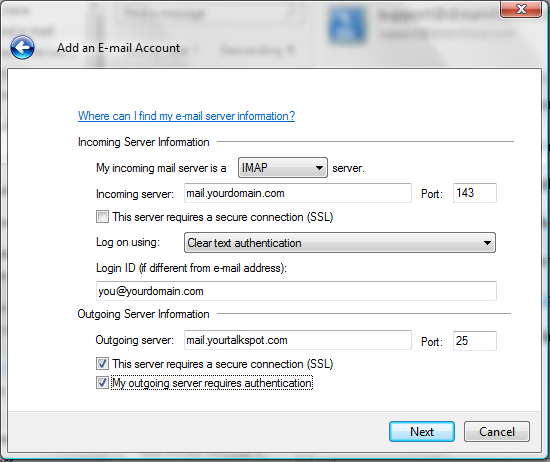
- Make sure you check Manually configure server settings for e-mail account? and click Next.

- (Below) Choose either IMAP (multiple devices - synschronized) or POP (check with 1 device) from the drop down menu. Both incoming and outgoing servers are mail. followed by your domain name.
-
Incoming Server: mail.yourdomainname.whatever
- IMAP | Port 143 (Insecure Transport - No SSL function enabled)
- IMAP | Port 993 (Secure Transport - SSL function enabled)
- POP3 | Port 110 (Insecure Transport - No SSL function enabled)
- POP3 | Port 995 (Secure Transport - SSL function enabled)
Outgoing
Server: mail.yourdomainname.whatever
- SMTP | Port 587 (Insecure Transport - No SSL function enabled)
- SMTP | Port 465 (Secure Transport - SSL function enabled)
- SMTP | Port 25 (username/password authentication MUST also be enabled!)
- Check this server requires a secure connection (SSL) if you choose and change Port input box to the correct Port as indicated above
- Log on using (leave it) clear text authentication
- On Login ID make sure you type your full email address.
- Change Port next to Outgoing Server to 465
- Check both This server requires a secure connection (SSL) and My outgoing server requires authentication at the bottom of the wizard. Click Next
-
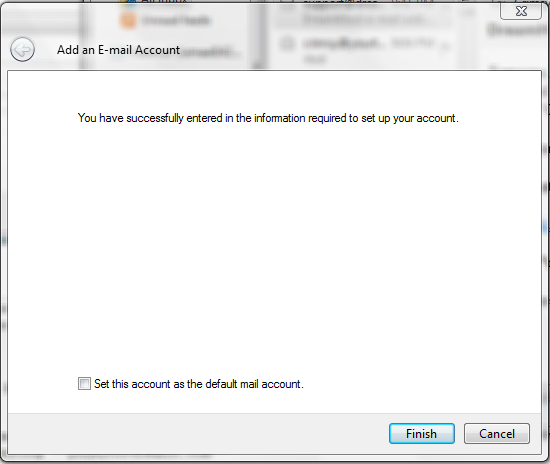
- After clicking Finish it will add the account and then check the server and download any email you have.
'Special' folder designation
By default, Windows Live Mail 2011 will not assign your Drafts, Junk, Sent and Trash folders correctly. To rectify this, go to the properties page of your account (ALT+S then ALT+P when viewing normal email) and under the IMAP tab, enter the following:
- Sent Items path: Inbox.Sent
- Drafts path: Inbox.Drafts
- Deleted Items path: Inbox.Trash
- Junk path: Inbox.Junk
Troubleshooting and Ports
- Sending Error
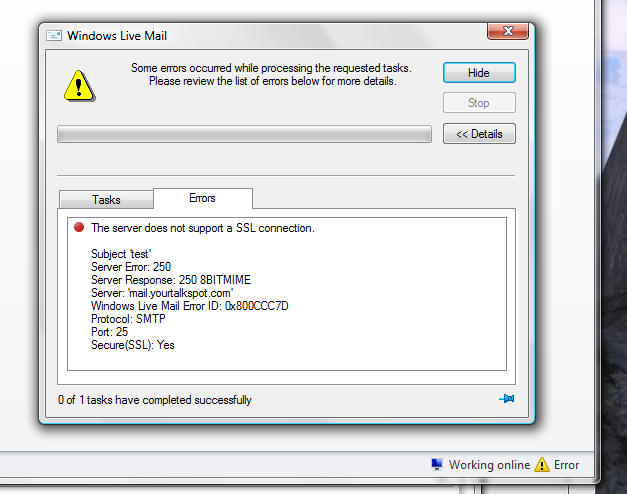
- If you can't send any email with an Error either saying that ' Server does not support SSL connection ' or similar try changing your outgoing port to the alternative Port 587 by Right Clicking your account and selecting Properties
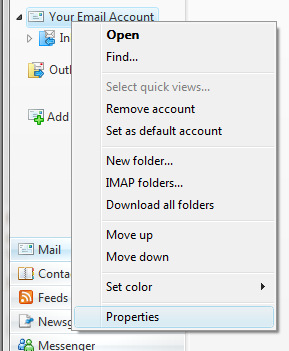
- Change port to 587 and Ok everything.
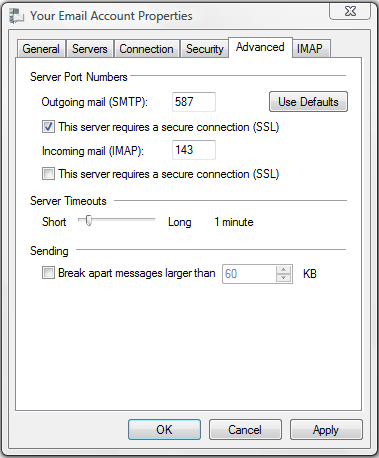
SMTP Port 587 is the alternate for (blocked) port 25
On the Advanced tab, change port 25 to 587, if your ISP blocks port 25.